Pro Tips
Fake Wounds Special Effects Make-up for Halloween
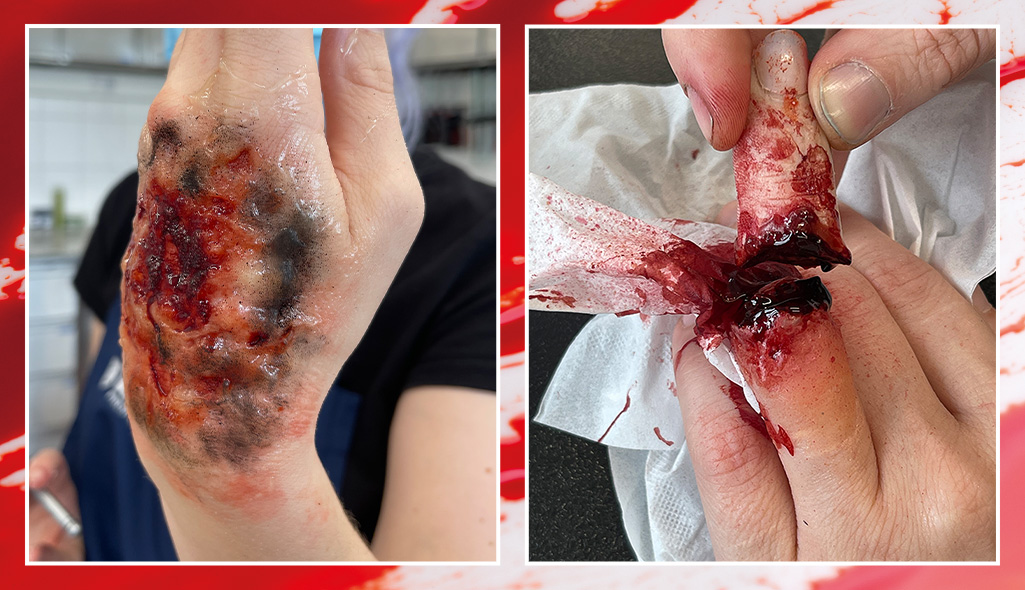
SFX make-up idea for Halloween 1:
scary acid wound on the hand

Step 1: Gelafix Skin (sachet) is used as the base product for this wound. It is preferably warmed in a baby bottle warmer. The advantage is that the product is thus never heated too much.
Step 2: While Gelafix Skin (sachet) is warmed up, apply a mixture of different shades of red from the Set Body Illustration Make-up Color 18 couleurs (FX) to the back of your cleaned hand. It should look like you bumped your hand hard somewhere, and some areas should look bluish-purple.
Step 3: In the meantime, Gelafix Skin (sachet) has melted to a gel-like consistency. Now you can apply it to the made-up bluish-purple spots and spread it with a Spatule de mélange. Make sure that the distribution is not too neat and looks like your skin has thrown bubbles. Smooth out the corners with the spatula to make it easy to fix the Gelafix Skin (sachet). If you wish, you can also apply some Adhésif Pros-Aide - The Original - 50 ml before applying Gelafix to improve the durability of the wound.
Step 4: After Gelafix Skin (sachet) has dried a bit, mattify with Spray matifiant 50 ml.
Step 5: Again, grab the Set Body Illustration Make-up Color 18 couleurs (FX) and apply a mixture of the different shades of red to the wound so that it looks slightly bloody and burnt. Also, apply a few drops of Faux sang Supreme Blood External 50 ml to further enhance the effect.
Step 6: Now comes a true insider tip. Crush a vitamin C tablet of your choice and apply the crushed powder to the wound. Now spray Spray matifiant 50 ml on top of that. The effect is a "fresh" acid wound.
Step 7: The final step is to add some Deep Black from the Palette Eye Shadow 15 couleurs (Smokey Rose) to the edges to give the acid hand a charred look.
<h4>Good to know:</h4> You can easily take the fake wound off by pulling it. Make sure to not expose it to extreme heat or water as it affects the durability of the wound.
SFX make-up idea for Halloween 2:
bloody chopped finger

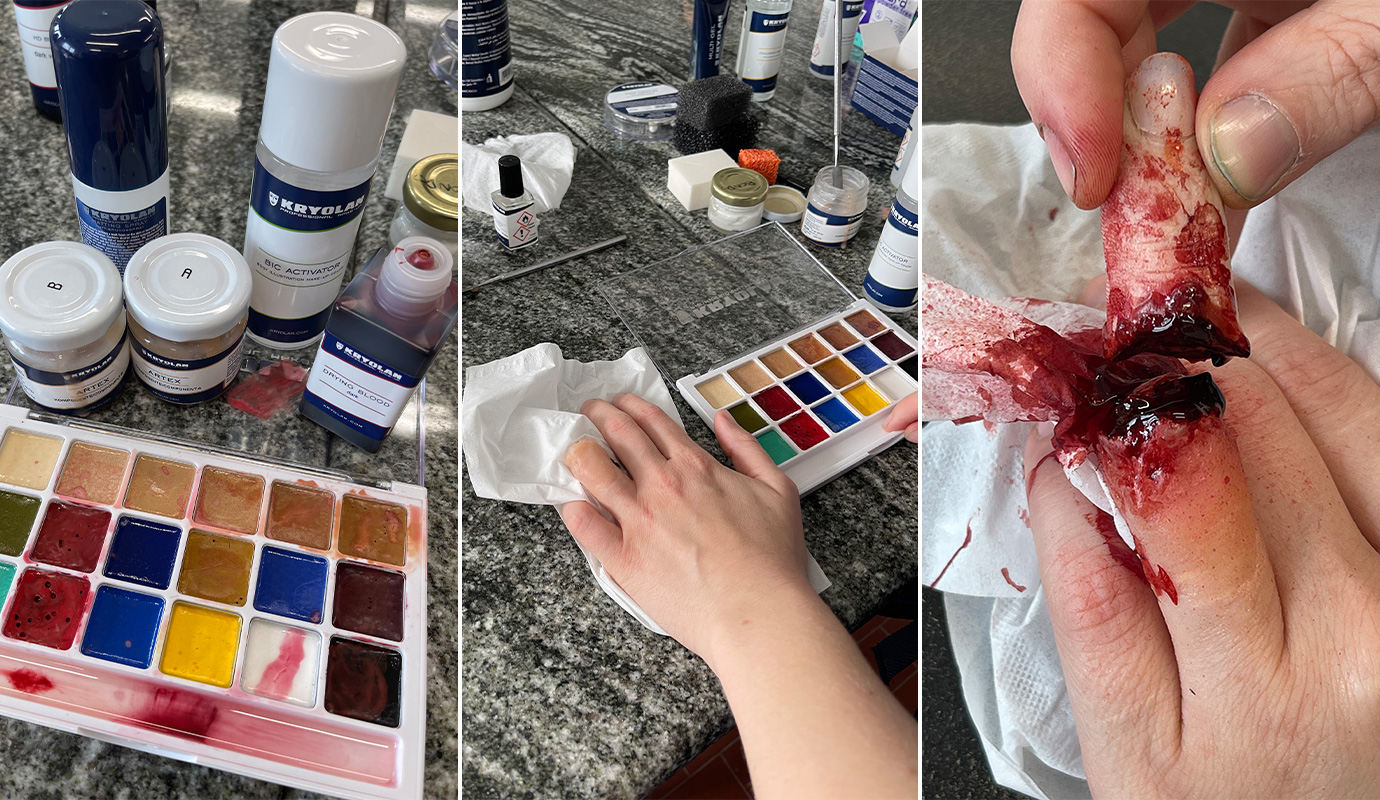
Step 1: In the first step, use Artex to sculpt an approximate copy of the top of one of your fingers. For the nail, you can use an artificial one from the drugstore and apply it to your sculpted Artex finger using Adhésif Silicone Adhesive NEO Strong Bond 100 ml.
Step 2: Now bend your real finger down so that only your first finger limb is visible. Now apply a layer of Artex to the end of this finger limb. This layer should lean against the previously modeled finger part so that the wound, later on, looks especially real.
Step 3: Using a Pinceau Illusion Finer Point Brush, apply a mix of different red shades from the Set Body Illustration Make-up Color 18 couleurs (FX) to the Artex of your finger. The wound should look as if blood has been squirted out.
Step 4: Now drip Faux sang Drying Blood 50 ml onto the painted wound so that it looks like blood is coming out of the finger.
Step 5: The same procedure as in steps 3 and 4 is now done with the artificial finger. Then place the artificial finger on the end part of your real finger and move it away so that the blood pulls strings. The effect should look really creepy.


